This is a post written primarily for my fellow SLPs, however many parents may find this post interesting as well 🙂 There are affiliate links to Amazon in this post for your convenience.Â
 Oh the dreaded /r/. If you are an SLP reading this, you know what I mean. The /r/ can be SUCH a tricky sound to teach and it can take a LONG time to get a child to be able to produce it correctly.

I do love my big ol’ mouth
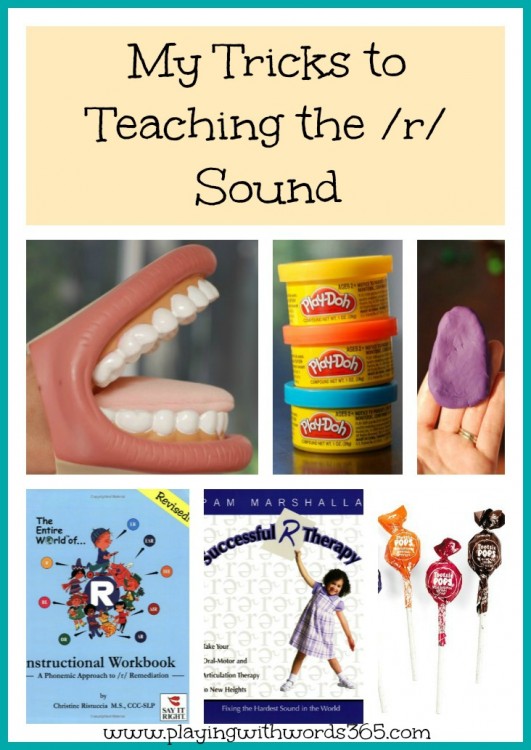
My first year working with children on the /r/ was a ROUGH year. I googled and googled and read and read whatever I could find. There are even whole books dedicated to teaching the /r/!! But even with reading the books and blogs and websites, I have still come across kids that are just not getting it. So, every year I have continued to post on the message boards and google in the effort to figure out that one kid that I can’t just get to produce an /r/. I’m going to tell you the steps that I have used to teach the /r/ that I have been successful. I basically have combined a couple different methods I have read about paired with a little of my own creativity. Here we go! Materials You may need to teach the /r/:
- Synthetic Vinyl Powder Free Gloves
: You should wear them anytime you are working near the mouth.
- Hand Held Mirrors
for each child
- Play Doh- the Play-Doh Mini Tubs
work PERFECT and you can let the kids play with them when they are waiting their turn.
- Dum Dum Pops
or other mini suckers (I prefer mini Mini Tootsie Pops
).
- If candy is an issue, you can use Flavored Tongue Depressors
(but I’ll tell you, they are not NEARLY as motivating).

Mini tubs work great
Here is what I do:
- I hand out a tub of Play-Doh
- I then do a whole lesson about how we make the /r/ sound with our tongue. I describe verbally the two different ways one can make an /r/, the tongue tip/retroflex /r/ and the bunched/back /r/ as well as show them illustrations of both, and show them a video of he /r/ being produced at the University of Iowa site.
- I then label the different parts of the tongue using our Play-Doh
to do this. It is a great tool!

My purple tongue
- Now, I take my Play-Doh
- Next, I ask each student to take their Play-Doh
- After the visual lesson, it is time to get physical. I bust out the mirrors (more visual feedback) and the mini suckers. Their eyes LIGHT up. We get SUCKERS?Talk about motivating! I keep my Play Doh tongue out as a visual as well.

Mmmmm
- These next few steps are similar to Pam Marshalla’s The Essential Butterfly Position that she describes in her book Successful R Therapy (although I had used these methods before I ever read her book). I have each child open his/her mouth and I take the mini sucker of their choice, and I rub the sides of the tongue, from the back forward, on both sides. I label the parts of the tongue for them and then I tell them this is the part of the tongue that needs to push up on your top back molars. I also label this on my Play Doh tongue.
- Next, I have them bite on the areas I just rubbed. This helps give them more tactile feedback, while spreading out the tongue. Most kids can do this first try, others I have to work at a bit.
- After they can bite on the sides, I again rub the sides of the tongue with the sucker. Then I tell them to push the sides of the tongue up on the top molars HARD while saying the “eeeeee” sound. This is to work on getting enough pharyngeal constriction. I have them practice the “e” really exaggerated by telling them to say the “ee” with a really “tight throat” or like they are “pushing the ‘ee’ down their throat.”
- This next step, I got from an article I had read a few years ago, and found the method successful in several of my students: Eureka! on ADVANCE for SLPs. I have the students hold their “eee” sound while biting their sucker with the front teeth to keep their jaw slightly open and then I instruct them to keep their tongue pushed up on the upper teeth for “E” and then slowly slide the tongue backwards while saying “Eureka” very slowly. I would tell them to say the work with a very TIGHT tongue while pushing HARD on the top teeth. Having the child bite on the sucker will keep them from moving their jaw during the /r/ production. I tell them The /r/ is made with your tongue, not your jaw.”

The Mighty Mouth!
- Inevitably, once the child gets to the /r/ sound, the placement will breakdown, but often that first “Eureka” results in a slightly closer approximation. At this point, I look into the mouth to see what “kind” of /r/ they are closest to producing, the tongue tip/retroflex /r/ or the bunched//back /r/. Then from here I continue to watch carefully, giving him/her constant feedback to help shape the correct placement. I continue to have the child bite on the mini sucker (you can also have them bite on three flavored tongue depressors taped together if the use of candy is a problem).
- I do trials of 10 productions of Eurkea, each one with more feedback, and then give them a break. Some feedback may include telling them to tighten up their tongue or throat more, pushing harder on the top teeth with the tongue sides, moving the tongue tip up or down, push the /r/ “down your throat” (I have found this one pretty effective to getting the kids to tighten up and push). Another one I found effective was to touch the middle of the back of their head, and tell them to try to push their tongue in that direction.
- Once the child has a good /r/ production in Eureka, I have him hold the /r/ sound and then add the “ed” sound, to produce the word “red” (using coarticulation). So, I have them say “yerrrrrrrrrrr” pause, and then “ed”. Slowly we work towards “yerrrrrrrrrred” and then drop the “yer”. Once the child has a strong /r/ in red, I will use coarticulation to teach the productions of all the different types of /r/ (er, ear, ire, air, ar, or, and words containing /r/ and /l/ if they are a problem).
- See below for the programs and resources I use to work on the /r/ sound after I am able to teach a successful /r/ sound.
- Another tip: If at ALL POSSIBLE, I recommend trying to work on placement with your students 1:1 or 1:2. See if you can pull the child at a different time for a couple weeks on their own to teach placement. I know, I know, this is not always possible if you are in the schools..but having that 1:1 or 1:2 time can make a HUGE difference in how quickly they can learn placement.


A note about the two types of /r/: If you are an SLP, you know there are two ways people produce the /r/, and some people will actually produce both types depending on phonemes that surreound the /r/. My husband, in fact, produces BOTH types of /r/. The two types are the Retroflexed/Tongue Tip /r/Â and the Bunched /r/. I personally make the bunched /r/. I think one mistake some SLPs make is trying to teach all students the same type of placement. I always try to see which /r/ placement the student is closest to and then go from there. Additional Resources on how to teach the /r/:
- Check out my How To Elicit the /r/ Sound Part One for a TON more elicitation techniques for the /r/ and then check out Part Two where I share a ton of materials for teaching and working on the /r/.
- I learned a LOT from Pamela Marshalla’s book (affiliate link ->)Â Successful R Therapy: Fixing the Hardest Sound in the World
 and recommend reading it if you work in the schools (or plan to). She has a ton of different elicitation techniques for both /r/ placements. There is a LOT of information in this book though, so don’t expect to just read it all one night and use it the next day in therapy. In fact, I found it a bit overwhelming at first.
- For actual practice, I like the (affiliate link ->)Â The Entire World of R
series by Say it Right and really love the book Vocalic R to Go! by Beverly Plass. I also made some word lists for all the different types of /r/ that I have used in my drill (If I find them I will post them in my FREEBIE section).
- I have been successful in using coarticulation to help teach the /r/ and have used fellow SLP Dawn Moore’s program that you can find at her website, Expressions Speech. Be sure to check out her site, as she all kinds of great goodies 🙂
- Need more tips on eliciting the /r/? Check out Judith Kuster’s elicitation techniques site
A note on therapy and progress: The two major keys to progress is making sure you can get as many productions per session as possible and daily practice. I aim for 75-150 correct productions per session, depending on the group size (30 minute groups). Once the child can produce the sound well with me, I send home easy homework…a word list that needs to be practiced for 5 minutes every night. That is all- just five minutes. I have a fun way of challenging the students, I’ll have to post about it soon. So that is how I teach the /r/ in 15 steps. I hope some of you find this helpful!! Cheers!
wooow! very nice 😉
I want to ask you from where can I buy the mouth model??
thank you verrrrry much
Randa you can get the Jumbo Mighty Mouth at Super Duper Inc at this link http://www.superduperinc.com/products/view.aspx?pid=MOUTH32. 🙂
1,000 thanks for sharing this information, Katie! My six-year-old has recently started bursting into tears sometimes when we can’t understand what he’s saying because of his rhotacism. I have tried to help show him where to put his tongue, but had gotten nowhere. Can’t wait to use this info with him in the morning!
Good luck Christina!
Love the playdoh tongue idea. I use the Butterfly Exercise to teach /r/ also, but some of the kids have so much trouble understanding it. Your ideas will be very helpful for teaching it.
Suzanne recently posted..Easter Egg Hunt Fun
That is a great idea in terms of the students feeling in a kinesthetic manner how to make a retroflexed and/or retracted /r/ depending upon what they do naturally based on the results of the Entire World of R Advanced screening by Say It Right.
WOW! Amazingly thorough post. Thank you! 🙂
Thanks Becca! 🙂
Hi Katie,
My name is Courtney. I am an SLP in rural eastern Oregon. I just ran across your blog via Pinterest (Hurray for Pinterest!!), and I just have to say that you are an amazing SLP and have contributed a wealth of priceless knowledge. I think it’s safe to say that you have become my new “go to” blog. I am so excited to continue to delve into your information!
Thank you!
This exercise in teaching the /r/ is life-changing! I have started using it on a number of children, some who have struggled for years learning /r/ in isolation. And after one session, they can say /r/ in multiple words with multiple vowels. Every speech therapist should know about this!
Katie, this is fantastic news!! Thank you so much for letting me know that this is helping you! This made my month!
Katie, is there any way I can write about this /r/ trick on my website? I run a speech-therapy business and would love to share this. And of course I will give you the credit. Just let me know! Thanks!
I am a reading specialist and I can not tell you how many problems I have with children who have learned only the ‘ENDING’ /r/ sound. The ‘BEGINNING’ /r/ is like a puppy bark. If you only teach your students the ending r (as in car) then they spell everything that has an r sound in it WITHOUT A VOWEL! Please don’t do this! It is almost impossible to teach them that finger is not spelled fingr! And I’m talking about 3, 4 and 5th graders!
Jan, I am confused in what you are frustrated with?
Jan,
SLPs teach the consonant /r/ production (as in “red”), and the vocalic /r/ productions (as in “turkey”, “bark”, “fear”, etc). Not all students have difficulty with both-if they do, we work on both. Also-as speech-LANGUAGE pathologists, we are very motivated to work on phonics and phonemic awareness as well. With my students, the words we target are also presented in written form, as a model for the correct spelling, with the vocalic /r/ production underlined in red (as in “bark”).
Great information here! You mentioned that you might post your r word lists in the freebies section. Have you been able to do that yet?
This has been hugely beneficial. My son has been in speech since he was 2 1/2 years old and just turned 8. For the past year, he has been working on the /r/ sound with the speech pathologist at his school, however, he has not made much progress. Now that school is out for the summer, I have been looking for some guidance/tool(s) to assist him so he doesn’t regress.
Last night was the first night that it “clicked”. I think connecting the physical aspect of the tonque to teeth and then making him think about the sound in his head before saying it did the trick. It’s not perfect but we were both jumping up and down after he nailed the intial /r/ sounds in 20 words. Yay!
That is FANTASTIC!!!!!! Congrats!!
Katie this article is AWESOME. Sharing for peeps on my FB page so they can check it out as well. I usually work with PK kiddos…and I’m a firm believer on working on /r/ LONG before it seems nondevelopmental but usually at these very young ages all I have to do is imitate and do some auditory stimulation and they get it over time…but now I have some older school age kiddos and /r/ can be so frustrating! I just purchased Pam’s R therapy book a few weeks ago but this resource is so awesome as well. Well done!!!!
Communication Station: Speech Therapy, PLLC recently posted..Tip Tuesday: Show me the data linky!
I have been a speech pathologist for years, but am wondering about your comment regarding the retroflex /r/. I have always found that students who use that production have significantly more difficulty generalizing the production. In addition production of the retroflex /r/in initial position seems to cause problems when followed by a long e sound (ex: refund). It sounds like the tongue is flicking the alveolar ridge on the way down to the long e. Have you noticed this? If so, any suggestions on how to eliminate it?
Hi Bonnie,
I have not experienced this exactly. What I *have* experienced is coming on to a caseload where the previous SLP taught ONLY the retroflexed and I had a LOT of frustrated students. Once I taught them bunched, they got it quickly. I think it’s important to teach the type they seem most comfortable making. So if you are not seeing carryover, perhaps they should be making it bunched. My husband uses BOTH depending on the word and his speech sounds fine. Good luck!
Hi there! I really enjoy your site. I was a little confused about how you teach the bunched r with the play doh technique. Can you elaborate on that. I tried the play doh with the retroflex r and it was helpful. Thank you
Thank you so much for this info! I am currently a Speech-Language Pathology assistant student, and for an articulation project I have been given the /r/ and/r/ blends. It truly is a hard sound! All this has been very helpful!!!! If you don’t mind I am going to use this info in the presentation and reference you as the source 🙂
After trying for a long time, I was finally able to teach my 4 year old how to form the R sound. I did it by asking him to point the tip of his tongue back like he was going to try to swallow it, and making a fish face with his mouth. When I did that, he produced a perfect R sound, and he was so excited about it. Now he can make perfect R sounds whenever he wants to.
But my problem now is breaking old habits, and I can’t seem to find any information on that. Everything I’m finding is tips on how to formulate the R sound, and I can’t find anything about how to break the old habits. If I correct him, he can say his words correctly. But when he is just speaking freely, he still pronounces most words incorrectly. Some instances of the R sound, he just says correctly now, like he just said the word “press”. He also says the beginning R sound correctly. Now most of his problem is when the R comes at the end of a word or syllable. He can say it correctly if I correct him, but he doesn’t think to do it on his own. Can anyone point me to any tips on how to help him break his old habits?
I have a child who has an ermerging /r/ in “gr,tr” contexts but cannot tighten the mid portion of the tongue. I sounds like he is trying to swallow a unched /r/. He can point the tongue tip but cannot maintain tension. “tr,dr” are less consistent. I have tried all the phonemes /zh,sh,y vowels and alveolar contexts for vocalic /r/.Suggestions?
Hi Katie, my 11 year old has been in speech therapy for 3 years now. We also practice our speech every day. We have our beginning R sound mastered, er and ir blends are coming along, but the ar and or blends are really a struggle. Her speech teacher keeps telling her to round out her lips when she says her “or” blends, but she just isn’t getting it. We are getting so tired of speech therapy! I was looking for some video tutorials for her when I stumbled upon your site..so thank you! Do you have any tips for a successful “or” and “ar” teaching method? Thanks, Melissa
Hi Melissa!
Since she has ER mastered, for the OR I recommend separating out the O and the ER. So, Say the long O then ER. O-ER. Practice that for a while. FO-R (for). MO-ER (more). STO-ER (store). After you practice words like this, you blend them together. MOOOOOOOEEEEERRRRR. (Then for AR aaahhhhh-er. Staaaaahhhhh-ER, etc.) Doing it this way also should allow your child to naturally round her lips, rather than having to *think* of rounding the lips. The problem with drawing too much attention to the lips is that some kids will focus on them, while their focus should be on the tongue placement for the /r/.
Try smiling, and saying the word “more.” You should find that though not precise, you can can make a decent OR without rounding the lips. This is because though the lips play a role, 90% that OR sound is made with the tongue. She will need to be able to learn to move her tongue for the /r/ regardless of the position of her lips. This can definitely take time.
Another example…round your lips and keep them rounded. Then say ER. Does it sound like OR? No, it should sound like ER. That is because the lip position only plays a small roll on the different /r/ sounds.
I hope this makes sense and helps!
Thanks so much for this article! I’m a linguistics student with a naturally retroflex r, and I never understood what was going on in r-bunchers’ mouths until now!
Katie, thank you so much. I’m a new SLP fresh out of my CFY, and completely frustrated with this issue of /r/ acquisition. A previous therapist has goals set at conversation level, but the kids are unable to produce /r/ even in isolation. I’m taking it way back to the basics to try to establish it at that level first, but nothing I am doing seems able to elicit the correct sound. You’ve given me some very functional tips. And hope! Thanks much.
For what it is worth, I had speech therapy until I was in 4th grade. My problem was the ‘r’ sound. The thing was I couldn’t hear that my ‘r’ was different from anyone else’s ‘r’. My ‘w’ sounded just like everyone else’s ‘r’ in my head. So after awhile I had no idea why I was in speech or ehat was wrong. We went round the room doing everyone’s sound (ra, re, ri, ro, ru). Then one day I was playing around with my tongue in speech on my own and heard the difference when I found the ‘r’ position. I kind of suspended my tongue in my mouth. My next turn on my ‘r’ sounds, I did it correctly and they were all so surprised! From that point on I intentionally changed my pronunciation and graduated from my years of speech in a few months. So, sometimes a kid can’t tell that they sound any differently and experimentation with tongue sounds helps!
Thank you SO much for this detailed information!!!!
I only have a few artic students on my caseload, since most of my students have language-based goals. /r/ is not my most comfortable sound to teach correction, but I am in the process of changing that…. so again, thank you!!
Good Grief, can’t wait to get started with this! My little guy inherited his somewhat super mother’s hard head, so at 6 he’s both frustrated with repeating himself and convinced that everyone else has a hearing problem. His teacher and Daddy and I all agree it’s gone on long enough, and once I have those dum dum pops he’ll be on board. Many many thanks!
Would it be possible to post a link to a youtube video with you demonstrating some of these techniques?
Amazing work and truly putting “evidence based practice” into action! Thank you so much for sharing your knowledge and experience with the rest of us SLPs and parents! This will be so useful and I am waiting for the next chance to put this into practice!!
I am trying to start a small private practice in California [I have four clients that I will be seeing on the campus of a local private school]. I bought malpractice insurance, but would like to open an LLC. Do I need to open a business LLC?
Hey Paige- in CA SLPs can’t have an LLC if you’re on your own.
Hi Katie,
I really LOVE all of this high quality useful information!! I am a reading therapist for students with language learning disabilities. Once I know they are hearing/producing/reading and writing a clean consonant r sound, msuch later in the Orton-Gillingham program we learn about r controlled vowels. er, ir, ur, or, ar.
For spelling purposes, it is very important that kiddos can feel the changes with their lips, tongue and teeth. Do any of the books you refer to discuss helping students with r controlled vowels vs. r?
I love all these tips. The thing that I am struggling the most with: they are doing the /r/’s but why does it sound different still. It just isn’t sounding 100% like a normal /r/. I am a new elementary slp. I have kids who are reported to produce /r/ 80-100% of the time but when I listen to them I hear that the /r/ sounds a bit distorted. Is that just how they are going to sound or can it be improved even more.